
For most brickwork, the safest way to remove paint from brick is a masonry-grade gel or poultice stripper, patient scraping, and a low-pressure rinse. This combination lifts paint without eating into the brick face underneath it.
Skip sandblasting entirely, and steer well clear of high-pressure washing on soft, old, or historic brick. Both strip away the weathered outer skin permanently, and that damage doesn’t grow back.
Before you start:
- Choose a masonry gel or poultice stripper suited to your paint type, not a generic solvent.
- Test on a hidden patch first, always.
- Rinse with a garden hose or low-pressure attachment, never a pressure washer on full blast.
- Call a professional if the brick feels soft, crumbles under a scrape, has many layers of oil-based paint, or the mortar looks shot.
Key Takeaways
Removing paint from brick safely comes down to gentle chemistry, patience, and knowing when the job has outgrown a DIY toolkit.
| Point | Details |
|---|---|
| Start with gel or poultice | Masonry-grade gel and poultice strippers lift paint without eroding the brick face beneath it. |
| Always test first | Apply any stripper to a hidden patch before committing to the whole wall. |
| Rinse low, not high | Use a garden hose or low-pressure attachment; high-pressure washing strips the brick’s protective face. |
| Respect the weather | Plan for a 48 to 72 hour dry window so the stripper dwells and the wall dries properly. |
| Know your limits | Soft brick, heavy paint layers, or damaged mortar mean it’s time to call Freshexteriors for a professional assessment. |
Table of Contents
- Which method actually strips paint from brick?
- How do you strip paint from brick step by step?
- Is it safe to remove paint from brick yourself?
- When should you hire a professional instead?
- What happens after the paint comes off?
- Professional paint removal that protects your brick
- A realistic note on what to expect
- Sources
Which method actually strips paint from brick?
Five approaches turn up in almost every guide on cleaning paint off brick, and they are not interchangeable. Choosing wrong wastes a weekend or, worse, costs you a wall.
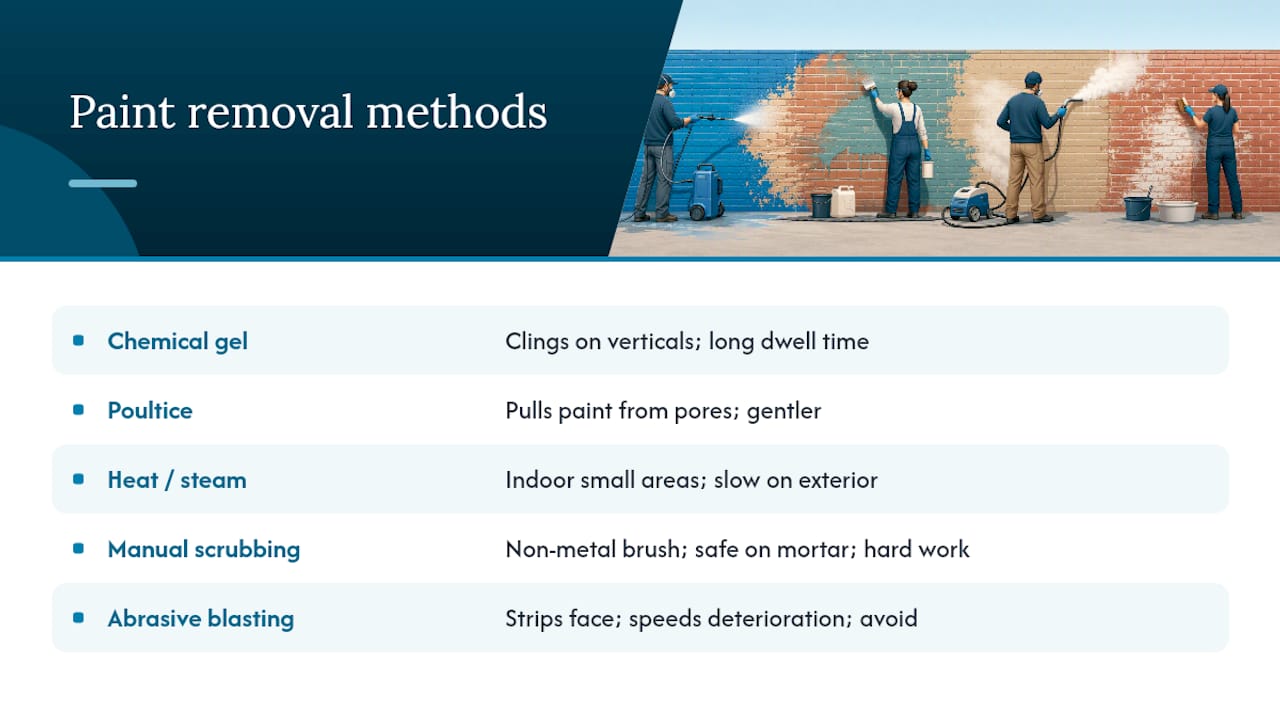
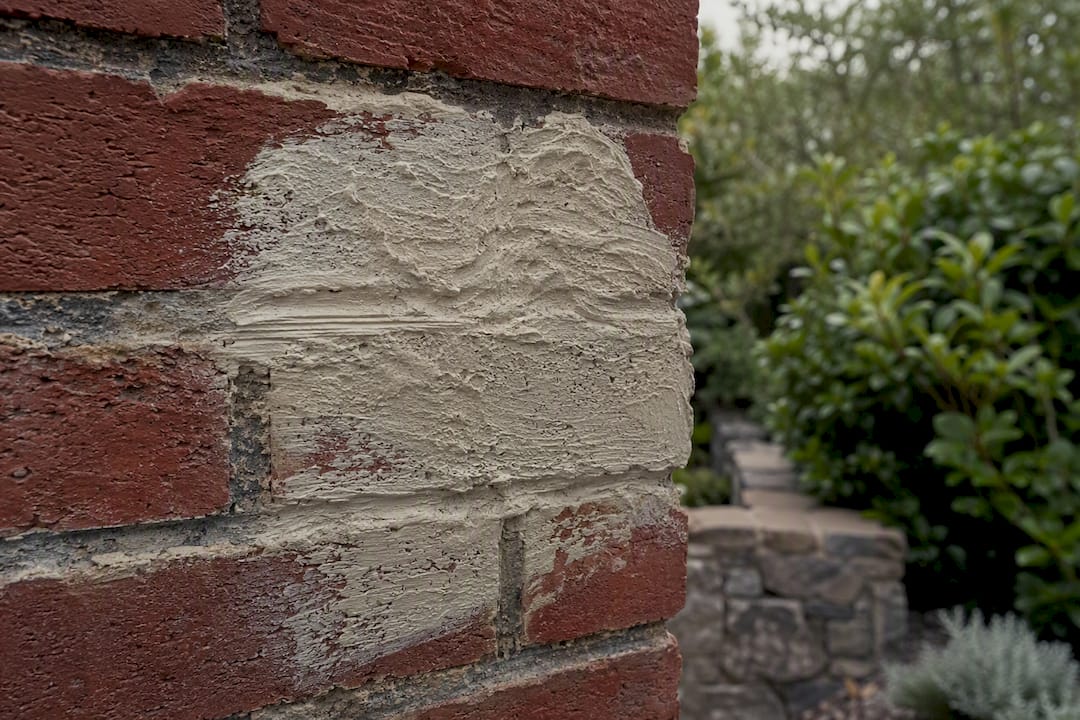
Chemical gel or paste strippers work best on vertical surfaces because they cling rather than run. They need real dwell time, usually measured in hours rather than minutes, and they’re the method most masonry-specific gel and poultice guidance points to as the industry standard, though results still depend heavily on the paint type and how porous your brick is.
Poultice systems pull paint out of the brick’s pores rather than just off the surface. Slower, yes, but gentler, and often the better choice on old, heavily textured brick where a gel alone leaves ghosting behind.
Heat and steam can work indoors on small sections, but exterior brick is porous enough that heat struggles to get through multiple layers, and it’s slow going on anything beyond a doorway surround.
Manual scrubbing with stiff, non-metallic brushes is safe and unglamorous. It takes muscle and time, but it won’t touch the mortar the way a wire brush will.
Abrasive blasting and high-PSI washing sit at the bottom of this list for a reason. Sandblasting and strong acids strip away the brick’s protective face permanently and accelerate future weathering, according to masonry restoration guidance on brick deterioration. Avoid both for a typical home job.
How do you strip paint from brick step by step?
Getting this right is less about brute force and more about sequence. Rush the dwell time or skip the test patch, and you’ll be doing this twice.
- Assess the wall. Work out whether you’re dealing with latex or oil-based paint, count the visible layers, and press a fingernail into the mortar joints to gauge how soft or crumbly the brick is. Pick an inconspicuous corner for your test patch, ideally somewhere shaded from the street.
- Protect everything nearby. Sheet off plants, windows, and any adjacent render or timber. If you’re using a solvent-based gel, wear a respirator rated for organic vapours, chemical-resistant gloves, and eye protection.
- Apply the stripper. Spread gel or poultice paste at the thickness the manufacturer specifies, typically a few millimetres, and press it into the mortar joints as well as the brick face. Cover with plastic sheeting on hot or breezy days to stop it drying out before it’s finished working. Masonry-grade gel and poultice strippers generally need several hours of dwell time, sometimes overnight for thick multi-layer paint, so check the tin and don’t guess.
- Scrape it off. Hold a plastic or wooden scraper at a shallow angle to avoid gouging the brick face. A drill-mounted fibre brush handles mortar joints and crevices without chewing into the lime or cement between bricks. Never use a metal scraper or wire brush on mortar.
- Rinse and check. Use a garden hose or a low-pressure attachment rather than a pressure washer. Industry cleaning guidance from Glen-Gery’s technical cleaning instructions recommends bucket-and-brush rinsing over high-pressure spraying specifically because excess pressure strips the brick’s protective face along with the residue. If your local rules require it, capture the runoff rather than letting it wash into a storm drain.
- Repeat where needed, then let it dry fully. Multiple paint layers almost always need a second application. Once the wall is dry, walk the whole area and look for mortar loss or brick damage that needs repointing before you call the job finished.
Pro Tip: Do your test patch in a spot that gets the same sun and wind exposure as the main wall. A patch tested in shade will dry and dwell completely differently to a south-facing gable, and that mismatch is where most DIY timing goes wrong.
Is it safe to remove paint from brick yourself?
Anything painted before the 1970s in many countries could contain lead, and you should treat older paint that way until you know otherwise. If you’re not certain, either test the paint or stop and bring in a specialist licensed for lead-safe removal rather than guessing.
Beyond that, PPE isn’t optional if you’re using a chemical stripper:
- A respirator rated for organic vapours, not a basic dust mask.
- Chemical-resistant gloves that cover the wrist.
- Eye protection and clothing you don’t mind ruining.
- Tarps and drip trays underneath your work area, with drains blocked off.
Weather matters more than most people expect. Professionals working on older masonry consistently point to a 48 to 72 hour window of dry, mild weather as the sweet spot for chemical dwell time and proper drying, according to the Chicago Bungalow Association’s guidance on vintage masonry. Start a poultice job the day before rain and you’ll be starting over.
When should you hire a professional instead?
Some jobs are DIY-friendly. Others aren’t, and knowing the difference before you start saves you money rather than costing you it.
Hire a professional when you’re facing any of these:
- Soft, old, or crumbly brick that fails a fingernail test in the mortar joints.
- Multiple layers of oil-based paint covering a large wall area.
- Mortar that already looks degraded, cracked, or missing in places.
- Any suspicion the wall has structural issues hiding under the paint.
A specialist like Freshexteriors brings controlled chemical systems, poultice application at scale, and low-pressure rinsing calibrated to the specific brick type rather than a garden hose and guesswork. That matters because the two most common DIY failures are permanent surface loss from over-aggressive scraping or pressure, and trapped moisture behind film-forming products that causes problems months later. Professionals also handle waste disposal properly and can move straight into repointing once the paint is gone, which most homeowners can’t do themselves in the same visit.
What happens after the paint comes off?
Removing the paint is only half the job. What you find underneath decides whether you’re finished or just getting started.
Walk the wall once it’s fully dry and look for efflorescence (that white, chalky bloom on the surface), gaps where mortar has crumbled away, or patches where the brick face looks rougher than the rest. Efflorescence usually brushes off with a dry stiff brush and resolves on its own as the wall continues drying. Mortar loss is a different matter entirely.
Repointing becomes necessary wherever mortar has visibly crumbled or fallen out, and contractors who do this work regularly plan for it as part of the job rather than a surprise, since removing old paint often reveals hidden mortar damage underneath that the paint had been masking for years.
If you’re sealing afterwards, choose a breathable penetrating sealer, silane or siloxane based, rather than a film-forming product that sits on top of the brick. Film-formers trap moisture inside the wall, which is exactly the problem you just spent a weekend fixing. If you plan to repaint, wait until the brick is completely dry through and use a masonry paint designed to breathe with the surface.
Professional paint removal that protects your brick
Freshexteriors specialises in exterior cleaning that works with the brick, not against it. That means low-pressure rinsing systems, poultice and gel application, and repointing expertise brought together so a paint removal job doesn’t turn into a brick replacement job.

If you’re weighing up a small doorway surround against a full gable wall covered in decades of oil-based paint, the calculation changes fast. A large area, brick that feels soft to the touch, or any hint of lead paint or structural concern are all good reasons to request a quote rather than spend a month on scaffolding with a scraper. For guidance on why low-pressure methods matter so much on masonry, Sweep & Scrub’s notes on pressure washing walls and edges cover the same principle professionals apply to brick.
Get in touch through the Freshexteriors booking page for a quote on paint removal, brickwork cleaning, or repointing, and let someone who does this daily take the risk out of the job.
A realistic note on what to expect
Stripping paint from brick rarely goes to plan on the first attempt. Multiple layers usually need two or three applications, and even a good poultice job leaves faint shadowing that only time and weathering fade further.
Budget more hours than you think you need, and treat the first metre as a test bed for timing, not just technique. If the wall turns out softer than expected or the mortar starts crumbling under your scraper, that’s your signal to stop and bring in someone who does this for a living.
— Michael
Sources
For deeper technical detail beyond this guide, these references cover manufacturer methods and cleaning standards in more depth:
- How to Remove Paint from Brick Without Ruining It – PTR
- Glen-Gery cleaning recommendations (technical profile)