
Warm water, a pH-neutral stone cleaner and a stiff nylon brush handle the vast majority of sandstone patio cleaning jobs safely. Never reach for acid-based or brick cleaners, and skip undiluted bleach altogether, since these can etch or discolour the stone permanently. Only bring out a pressure washer at low settings with a wide fan nozzle, and only when the routine method genuinely isn’t cutting it.
TL;DR:
- Using a pH-neutral stone cleaner with warm water and a stiff nylon brush is the safest method for cleaning sandstone patios, avoiding acids and bleach.
- Pressure washing should be done with a wide fan nozzle at low pressure, keeping the lance at least 300mm away and moving constantly to prevent surface damage.
- Different stains such as algae, black spots, oil, rust, and efflorescence require specific treatments, with biological stains best removed by biocides and oil stains by poultices, not aggressive scrubbing.
- Sealing options depend on location and porosity, but most sandstone patios only need cleaning once or twice a year, with spot-cleaning spills immediately for best results.
- Professionals should be called for delamination, deep rust stains, or crumbling joints, as proper technique and surface assessment are crucial to avoid permanent damage.
Table of Contents
- How to clean a sandstone patio the safe way
- How much pressure can sandstone actually take?
- How do you treat algae, black spot and other stains?
- What tools and cleaners are actually safe for sandstone?
- Should you seal your sandstone patio?
- When does sandstone patio cleaning need a professional?
- What actually matters most with sandstone care
- Book a professional sandstone clean with Freshexteriors
- Sources
How to clean a sandstone patio the safe way
Sandstone punishes shortcuts. It’s a soft, porous material, so the same aggressive scrubbing or acid-based product that works fine on concrete can leave permanent scarring here. The good news is that the safest method is also the simplest.
1. Prepare the area properly. Clear furniture, pots and rugs off the patio, then give the whole surface a dry sweep to lift loose debris. Pre-wet the stone with a hose before applying anything, and always test your chosen cleaner on a hidden corner first. Leave it for ten minutes and check for colour change before treating the whole area.
2. Mix the cleaning solution correctly. Warm water paired with a proprietary pH-neutral stone cleaner is the standard for sandstone cleaning, which reacts badly to acidic alternatives. Follow the label’s dilution ratio and dwell time exactly. Oversaturating won’t clean faster, it just risks pushing dirty water into the joints.
3. Scrub with the right tool. A stiff nylon or synthetic-bristle brush is the only brush that belongs on sandstone. Work with the grain of the stone in overlapping passes rather than scrubbing in circles, which can wear uneven patches into softer patches of the surface. Never substitute a wire brush, even on stubborn black spots. It will scratch the surface and give algae more texture to grip on next time.
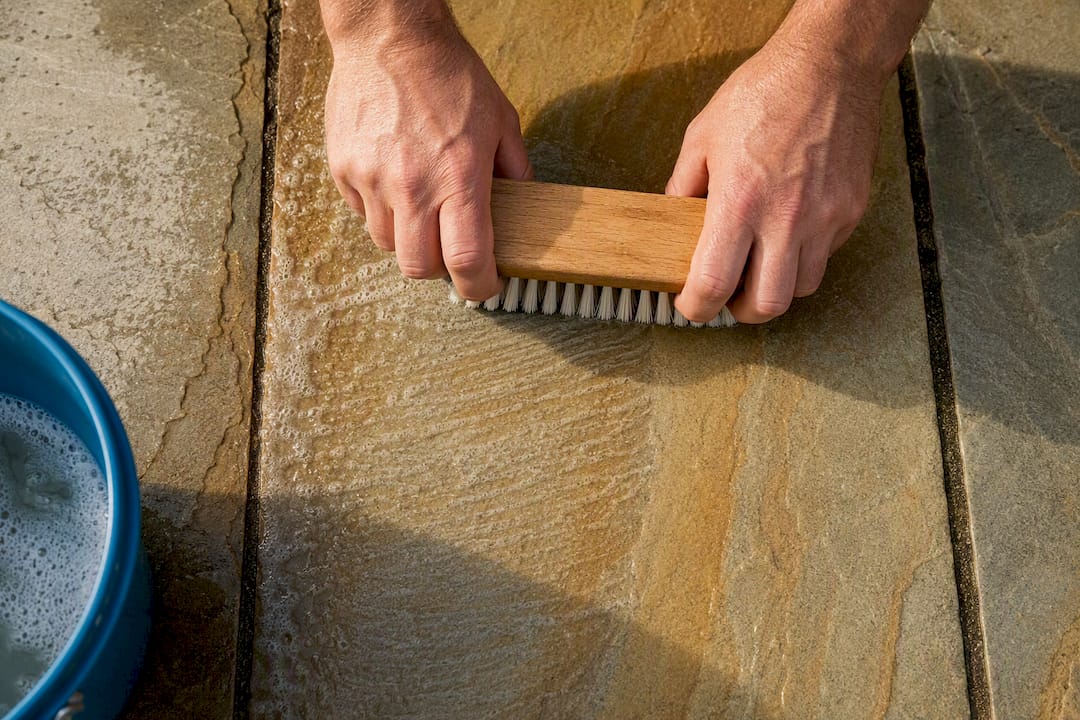
4. Rinse thoroughly and check the joints. Hose down the patio from one end to the other, checking that pointing and jointing sand haven’t washed out as you go. Pooling water in low spots usually signals a drainage issue worth noting for later, not a cleaning problem.
5. Tidy up. If you’ve used any chemical product, check the label for disposal guidance before letting rinse water run into flowerbeds or drains. Most stone-safe cleaners are fine to rinse away, but it’s worth the thirty seconds to check.
How much pressure can sandstone actually take?
Pressure washing sandstone paving is where most damage happens, and it’s almost always down to nozzle choice rather than the machine itself. Guidance from Universal Paving recommends a wide fan nozzle held at least 300mm from the surface, kept moving constantly rather than held on one spot. Pressure guidance from other trade sources suggests working conservatively, often in the region of 80 to 120 bar, and starting lower before increasing if the stone shows no reaction.
- Never use a pencil or turbo nozzle on sandstone. The concentrated jet strips the softer surface layers and leaves visible stripes that don’t buff out.
- Hold the lance at a shallow angle, not straight down, to spread the force across a wider area.
- A flat surface cleaner attachment, essentially a spinning bar inside a shroud, gives a far more even result than a handheld lance and cuts the risk of jet marks considerably.
- After washing, inspect the joints closely. If pointing sand has washed away or the surface feels rougher than before, you’ve gone too hard.
Pro Tip: Photograph your test patch before and after, and jot down the pressure setting, nozzle and dwell time you used. If it works, that record saves you from guessing next time.
If the patio has visible moss, algae or ingrained black spot rather than surface grime, a soft-wash chemical approach usually beats pressure entirely. It lifts biological growth at the root instead of blasting it off the surface, which only delays regrowth.
How do you treat algae, black spot and other stains?
Different marks need different fixes, and treating them all the same way is how good sandstone gets ruined. Here’s what actually works for each.
- Algae and moss: Scrape off the bulk with a plastic scraper first, then apply a proprietary algae remover labelled safe for natural stone, scrub with your nylon brush and rinse thoroughly. An algae inhibitor applied afterwards can slow regrowth for six to twelve months, which matters if your patio sits in permanent shade.
- Black spot and lichen: These are stubborn and results come slowly, often over several treatments rather than one session. A specialist stone-safe biocide is worth the investment here rather than repeated scrubbing, which tends to spread spores rather than remove them.
- Oil stains: Blot immediately with paper towel, never rub. For stains that have already set in, an absorbent poultice left over the area for 24 to 48 hours followed by a sandstone-safe degreaser lifts most of what’s left. Aggressive scrubbing at this stage usually spreads the oil further into the pores.
- Rust marks: Reach for a specialist rust remover formulated for natural stone. Generic rust treatments often contain acids that will stain sandstone permanently.
- Efflorescence (that pale, powdery bloom you sometimes see after wet weather) is cosmetic salt deposit and usually fades on its own with normal weathering.
- Dried mortar splashes: Try mechanical removal first with a plastic scraper or wooden wedge. Acid should only ever be a last resort, tested on a hidden patch first, since it’s the same chemical family responsible for the orange-brown staining that ruins sandstone elsewhere.
What tools and cleaners are actually safe for sandstone?
Getting the kit right matters as much as technique. A stiff nylon brush is your workhorse; save wire and metal bristles for concrete or metal surfaces, never stone.
- Brushes: Stiff synthetic bristle for general cleaning, a soft brush for sealed or polished finishes.
- Attachments: A flat surface cleaner for anyone pressure washing regularly, plus a wide fan nozzle as the fallback for edges and corners.
- Cleaner labels to trust: Look for “pH-neutral” or “safe for natural stone” on the bottle. Avoid anything listing hydrochloric acid or described as a brick or patio acid cleaner.
- Specialist products: Keep a poultice product and a stone-safe degreaser on hand for oil, and a dedicated biocide for algae and black spot rather than reaching for household bleach.
Should you seal your sandstone patio?
Sealing isn’t compulsory, and plenty of well-maintained sandstone patios go unsealed for years. It does make ongoing cleaning easier, since a sealed surface keeps grime sitting on top of the stone rather than soaking into the pores, but sealing doesn’t make sandstone stain-proof. A quick response to spills still matters.
Whether it’s worth doing depends on a few factors:
- Location: Shaded, damp patios that struggle with algae benefit more from sealing than sunny, well-drained ones.
- Porosity: More porous stone absorbs oil and organic staining faster, making sealing more valuable.
- Desired finish: Some sealers enhance colour and add a slight sheen, which not everyone wants on a natural stone patio.
On maintenance timing, most sandstone patios only need a full clean once or twice a year, typically a spring clean after winter grime and moss, with an optional autumn tidy before wet weather sets in. Spot-clean spills immediately regardless of season. Once sealed, always check the sealer manufacturer’s guidance before using any new cleaning product, since some chemical cleaners can strip certain sealer types.
When does sandstone patio cleaning need a professional?
Freshexteriors’ approach starts with assessing the stone itself before touching a hose. Different sandstone types vary in porosity and hardness, so the crew tests a patch, checks how the surface reacts, and chooses between a pH-neutral treatment, a full soft-wash, or controlled low-pressure washing based on what the stone can actually handle.
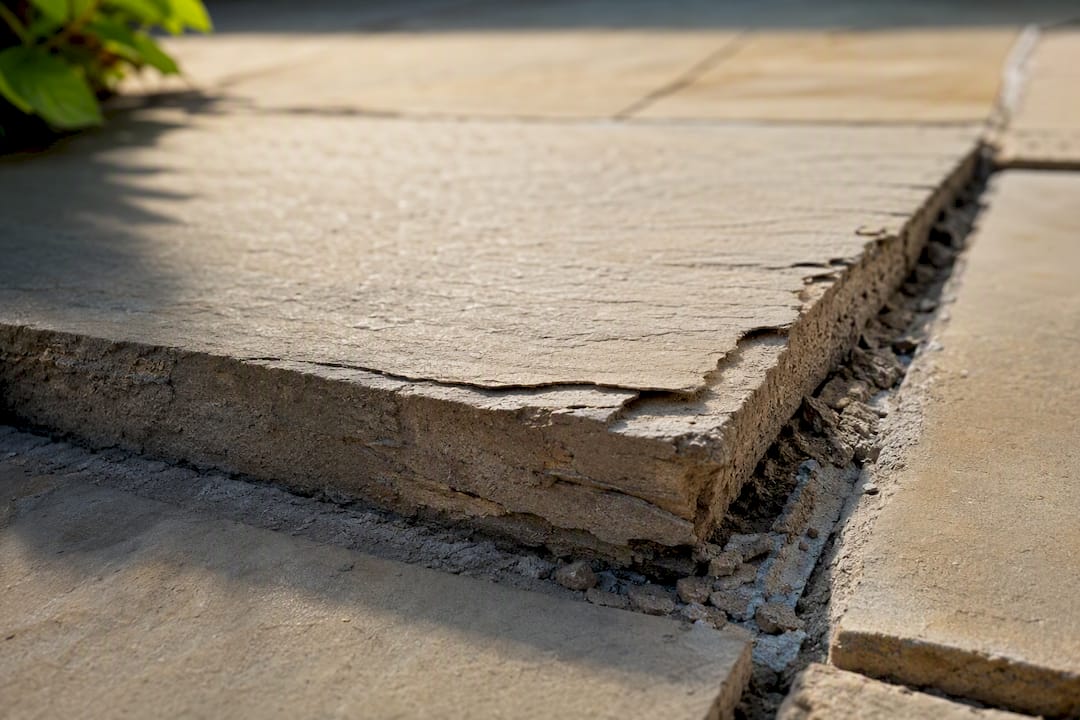
Some signs mean it’s time to stop DIY attempts and call someone in. Delamination, where thin layers of stone begin flaking or lifting, gets worse with more washing, not better. Embedded iron staining that’s turned deep orange or rust-brown, often from a previous acid mistake, needs specialist treatment rather than another scrub. Badly eroded or crumbling joints are also a sign the patio needs repointing alongside cleaning, not instead of it.
What actually matters most with sandstone care
Most sandstone patio advice online treats pressure and pointing at the pressure washer dial, when the real variable is technique. Two people running identical machines at identical settings get wildly different results depending on nozzle choice, distance and how long they linger in one spot. That’s the detail conventional guides tend to bury.
The bigger failure I see in generic cleaning advice is treating sandstone like any other paving material. It isn’t. Indian sandstone in particular is softer and more porous than concrete block paving or granite setts, which means the safe range of “acceptable” cleaning is genuinely narrower. Push it too hard once, and you’re not looking at a quick fix. You’re looking at permanent striping or stripped surface texture that no amount of sealing will hide.
If there’s one thing homeowners should prioritise first, it’s restraint. Test before you treat the whole patio. Start low on pressure and increase only if the stone shows no reaction. The instinct to go harder when something isn’t working straight away is exactly the instinct that ruins sandstone.
— Michael
Book a professional sandstone clean with Freshexteriors
Freshexteriors gives you the judgement call most DIY guides can’t: knowing exactly how far to push a pressure washer before sandstone starts to suffer for it. A professional visit starts with an inspection of your stone type and condition, followed by a tailored plan, usually a soft-wash or controlled low-pressure clean matched to what the surface can safely handle.

Beyond the clean itself, the team can repoint worn joints while they’re on site and talk you through whether sealing makes sense for your patio’s location and porosity. All you need to prepare is clear access to the patio and furniture moved out of the way; turnaround on most residential jobs is straightforward and scheduled around your availability rather than a rigid slot. If your sandstone is looking tired, patchy, or has taken a knock from a previous DIY attempt, get a quote from Freshexteriors and get it back to looking the way it should.